
Why need lifecycle policies?
You can use lifecycle policies to define actions you want Amazon S3 to take during an object's lifetime (for example, transition objects to another storage class, archive them, or delete them after a specified period of time).
You can define a lifecycle policy for all objects or a subset of objects in the bucket by using a shared prefix (that is, objects that have names that begin with a common string).
A versioning-enabled bucket can have many versions of the same object, one current version and zero or more noncurrent (previous) versions. Using a lifecycle policy, you can define actions specific to current and noncurrent object versions.
2. In the Bucket name list, choose the name of the bucket that you want to create a lifecycle policy for.

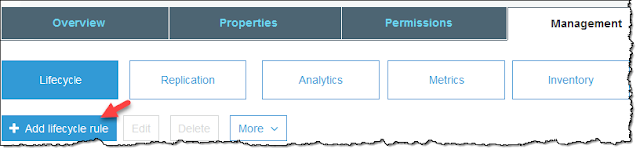
3. Choose the Management tab, and then choose Add lifecycle rule.
4. In the Lifecycle rule dialog box, type a name for your rule to help identify the rule later. The name must be unique within the bucket. Configure the rule as follows:
You can define a lifecycle policy for all objects or a subset of objects in the bucket by using a shared prefix (that is, objects that have names that begin with a common string).
A versioning-enabled bucket can have many versions of the same object, one current version and zero or more noncurrent (previous) versions. Using a lifecycle policy, you can define actions specific to current and noncurrent object versions.
To create a lifecycle policy
1. Sign in to the AWS Management Console and open the Amazon S3 console at https://console.aws.amazon.com/s3/.2. In the Bucket name list, choose the name of the bucket that you want to create a lifecycle policy for.

3. Choose the Management tab, and then choose Add lifecycle rule.

4. In the Lifecycle rule dialog box, type a name for your rule to help identify the rule later. The name must be unique within the bucket. Configure the rule as follows:
- To apply this lifecycle rule to all objects with a specified name prefix (that is, objects with names that begin with a common string), type a prefix in the box, choose the prefix from the drop-down list, and then press Enter. For more information about object name prefixes, see Object Keys in the Amazon Simple Storage Service Developer Guide.
- To apply this lifecycle rule to all objects with one or more object tags, type a tag in the box, choose the tag from the drop-down list, and then press Enter. Repeat the procedure to add another tag. You can combine a prefix and tags. For more information about object tags, see Object Tagging in the Amazon Simple Storage Service Developer Guide.
- To apply this lifecycle rule to all objects in the bucket, choose Next.


5. You configure lifecycle rules by defining rules to transition objects to the Standard-IA, One Zone-IA, and Glacier storage classes. For more information, see Storage Classes in the Amazon Simple Storage Service Developer Guide.
You can define transitions for current or previous object versions, or for both current and previous versions. Versioning enables you to keep multiple versions of an object in one bucket. For more information about versioning, see How Do I Enable or Suspend Versioning for an S3 Bucket?.
Select Previous versions to define transitions that are applied to all previous versions of the object.
b. Choose Add transitions and specify one of the following transitions:
- Choose Transition to Standard-IA after, and then type the number of days after the creation of an object that you want the transition to be applied (for example, 30 days).
- Choose Transition to One Zone-IA after, and then type the number of days after the creation of an object that you want the transition to be applied (for example, 30 days).
- Choose Transition to Glacier after, and then type the number of days after the creation of an object that you want the transition to be applied (for example, 100 days).
Important
Amazon S3 stores the archived objects in Glacier. However, these are Amazon S3 objects, and you can access them only by using the Amazon S3 console or the Amazon S3 API. You cannot access the archived objects through the Glacier console or the Glacier API. For more information, see Transitioning Objects: General Considerations.
6. When you are done configuring transitions, choose Next.

7. For this example, select both Current version and Previous versions.
8. Select Expire current version of object, and then enter the number of days after object creation to delete the object (for example, 395 days). If you select this expire option, you cannot select the option to clean up expired delete markers.
9. Select Permanently delete previous versions, and then enter the number of days after an object becomes a previous version to permanently delete the object (for example, 465 days).
10. It is a recommended best practice to always select Clean up incomplete multipart uploads. For example, type 7 for the number of days after the multipart upload initiation date that you want to end and clean up any multipart uploads that have not completed. For more information about multipart uploads, see Multipart Upload Overview in the Amazon Simple Storage Service Developer Guide.
11. Choose Next.

12. For Review, verify the settings for your rule. If you need to make changes, choose Previous. Otherwise, choose Save.
13. If the rule does not contain any errors, it is listed on the Lifecycle page and is enabled.
 Thanks for being here : Need help for Create Lifecycle Policy.

Comments
Post a Comment